Saturday, October 15, 2016

Cascading Circles Runner

To celebrate fall, I decided I really needed a new table runner. I was getting pretty tired of my old one, anyway. I didn't really have a lot of time for this, so I decided to do something very simple on the piecing front. As in ... virtually none.

I did a quick search for modern runner inspirations, and found a fabric design with a lot of circles running down in lines. I decided to use that as the inspiration for this runner, as it would be super easy and quick to do, and I can have a lot of fun quilting it too. Also, I've recently fallen in love with fusible applique and my new AccuQuilt cutter is just demanding to be used. The color was a big decision, as it turns out, I couldn't stomach most colors associated with fall. "Earthy colors", as my husband calls them. The only ones I do like, and I like these a lot ... are yellows and oranges. I decided to do a long strip runner with orange / yellow circles running down the center, and black/white/gray circles running down the sides.

I quilted the background with little swirls, as I thought the runner was just asking for it. I quilted inside the applique circles with a many petaled lotus flower. When it comes to the matching thread vs contrasting thread debate, I tend to stand on the side of matching thread, but I realize it's a double-edged sword. On one hand, I have some trouble seeing where I'm going, but on the other hand ... I can't even find my mistakes once I'm done.

I'm very pleased with it. The freedom of fusible applique is that I don't have to figure out how to piece it ... I just glue it!

Friday, October 14, 2016

Original Sewing & Quilting Expo 2016

The Original Sewing & Quilting Expo is happening this weekend in Schaumburg, so of course I had to check it out. This is my 3rd time to the Schaumburg Convention center, which I really like for easy (and free) parking, little walking (unlike Opryland), and best of all, it's only 15 minutes from my house!

As usual I first checked out the display galleries to take photographs of some really beautiful quilts. If a quilt attracts my eye, it's usually because I find the color combination really pleasing. Browsing through my photos, besides my usual modern aesthetic, I seem to have a liking for black-white-color quilts today.

Disclaimer: Although I didn't see any notices about photography in the exhibit, I'm going to assume that it's for personal use, so no printing or copying or things that disrespect the artist's copyright.

Left: Bull's-Eye - pieced and quilted by Alexandra Wright
Right: Mending Broken Hearts - pieced and quilted by Gloria Welniak

Left: Yellow Journalism - pieced and quilted by Rebecca Schmitt
Right: Crossroads and Cornerstones w/ Words To Live By - by Marjorie Walker

Left: Golden Web - pieced and quilted by Nancy Dorl
Right: Weaveworld - by Gigi Khalsa

Left: Not Xanthophobia - pieced and quilted by Carol McAdow
Right: Bias 4 - by Alissa Carlton

Left: Flounce - by Melanie Tuazon
Right: Under the Radar - by Corinne Sovey

The show was sufficiently small that I had lots of time to just play, and I stopped at a variety of booths and watched demos and even tried machines. Here the highlights of my day:

  • At the HandiQuilter booth (by Quilting Connection) I played with rulers with the Sweet 16. I already own one straight ruler, but I tried out the curved rulers, which are IMO much harder to use than straight rulers, and I have trouble enough with those. I also tried the Simply Sixteen which is a standup machine, and I'm further convinced that I don't like quilting with handlebars. There's so much momentum on them that I find it hard to execute.

  • I finally decided to try out stencils. I normally prefer freehand, but I would probably use them for when I want to do larger scale designs, as that's so much harder on my machine freehand. I ended up buying the starter pack from Hancy Creations, and got a greek key design (lots of straight lines!) and a baptist fan, to play with. We'll see if I like stencils enough to buy more.

  • I checked out the BurdaStyle booth and I was intrigued by garment sewing again. In the past, I disliked it mainly because dealing with that pattern paper (ironing it, and later folding it to store) was awful. But with Burdastyle's digital patterns that is digital and printable, at least the worst part of garment sewing for me is evaded.

  • I sat down and tried a Bernina sitdown quilting machine, similar to the Handi Quilter Sweet 16, but of course this one is quite a bit fancier. The fanciest feature on this is the Bernina Stitch Regulator, which is a lot better than TruStitch. However ... though I think the machine is lovely, I hardly use stitch regulators anyway, and I'm very happy with my Handi Quilter, and don't see a need to upgrade. I also saw the Bernina 790, and I think though I'm not in the market right now for a new sewing machine (and certainly not the Bernina 790), when I am, I might try saving up for a Bernina.

    And what's a good quilting show without plenty of fabric and supply hoarding? When I walked up to the register at one shop, someone asked me what I was planning on making with the pretty fabric, and I replied truthfully, "I have no idea." But that's the great thing about quilting ... I really don't have to know what I'm going to do with it, I don't have to worry about running out of fabric as I can always supplement with other fabric, and scraps do get used.

    As always, I take pictures of my pretty acquisitions all gathered in one pile before they get put away. Here it is:

    I don't think I have another quilt show to go to until April of next year, but who knows what might pop up. After all, I have a habit of finding out about a show a day before the show.

  • Tuesday, October 11, 2016

    A Garden Colorful

    I have a new favorite quilt. Yep, it's my Rainbow Petals quilt from Corey Yoder's Playful Petals, which I've renamed to A Garden Colorful. I just love how bright and cheerful it is!

    I used the AccuQuilt Go! to cut all my orange peels, so all my orange peels are 4.5", which is a little bigger than her template in the book. I had to adjust the size of the background pieces accordingly, but I like that better as it yields a bigger quilt. I hate putting sashing on, but this vertical sashing is at least easier than a grid sashing. I also finally figured out the blanket stitch, and realized I hate a black blanket stitch as it's so stark. I ended up using gray so it blended in nicely but also added a little outline and definition to some of the lighter petals. I saved the black for the binding, and rather enjoy the contrast with the white background fabric.

    I knew how I wanted to quilt this long before I was finished piecing, and for the most part I stuck to my plan. I echoed the sashing strips and covered them with orange peel designs. For the areas around the petals, I used an echo shell. I decided to quilt within the applique as well because otherwise it was too much left unquilted, and did simple swirls that looked more like a multi-tier hook. I learned halfway through that I didn't end up using enough contrast between the design in the sashing and the filler areas around the petals. I should have made the sashing less dense and the areas around the petals more so. Well, proper contrast is crucial to quilting planning and I'll know for next time. I'm still very happy with how everything turned out.

    Hang Them High

    For anybody who doesn't quilt on a frame, drag is a huge issue. I'd go out on a limb and say it's the biggest issue, even more so than thread tension. Although thread tension is annoying, once I get it right it tends to stay right at least for awhile.

    The solution against drag, short of getting a frame custom fit to the machine, is to take the quilt off the table just a little by suspending it. It doesn't look very pretty, and it requires quite a bit of adjustment, but it really works! I have 2 suspension setups, one on my Pfaff and one on my Handi Quilter Sweet 16. I'm against drilling things into my ceiling, so mine are both non-drill solutions.

    On the left, my Pfaff is using the Jennoop frame, which was built by a quilter for quilters. I don't use it very often because I don't do free-motion on this machine, just some walking foot quilting, but when I have used it, it works fairly well. I really like how easy the clamps are to hold and release.

    On the right, my Handi Quilter Sweet 16 uses these Dog Grooming Stand with clamps I purchased separately. These stands are the perfect size for clipping onto the Handi Quilter Sweet 16 tables that come with the machine. The idea is ingenious, but I can't take credit for it, it's from Katie's Quilting Corner. However, I think the clamps she uses are a bit small to hold up the quilts, and it can hurt my hand to use them as they're *very* tight. I'll probably swap these clamps out for something more like the clamps on my Jennoop frame.

    Whichever system I use, the key to getting the most out of them is to suspend the quilts at just the right height so that your quilt surface extends about 6 - 8 inches on each side from the needle before it lifts off the air on the sides. I still have to roll it in the front. You'll have to experiment to find the magic number, but usually, any more and it becomes less useful as drag reenters the picture, and less means it's very hard to navigate the quilt and you start to experience drag ... from up above! Therefore, I do have to readjust often, but readjusting is easy. It is very worth trying suspension as it makes quilting larger quilts not only possible, but much easier.

    Here are some more resources on quilt suspension:

    Quilt Too Big? Hang It Up! - from The Free Motion Project
    Take The Drag Out Of Free Motion - from Katie's Quilting Corner
    Quilt Cradle - from Bryerpatch Studio

    Monday, October 10, 2016

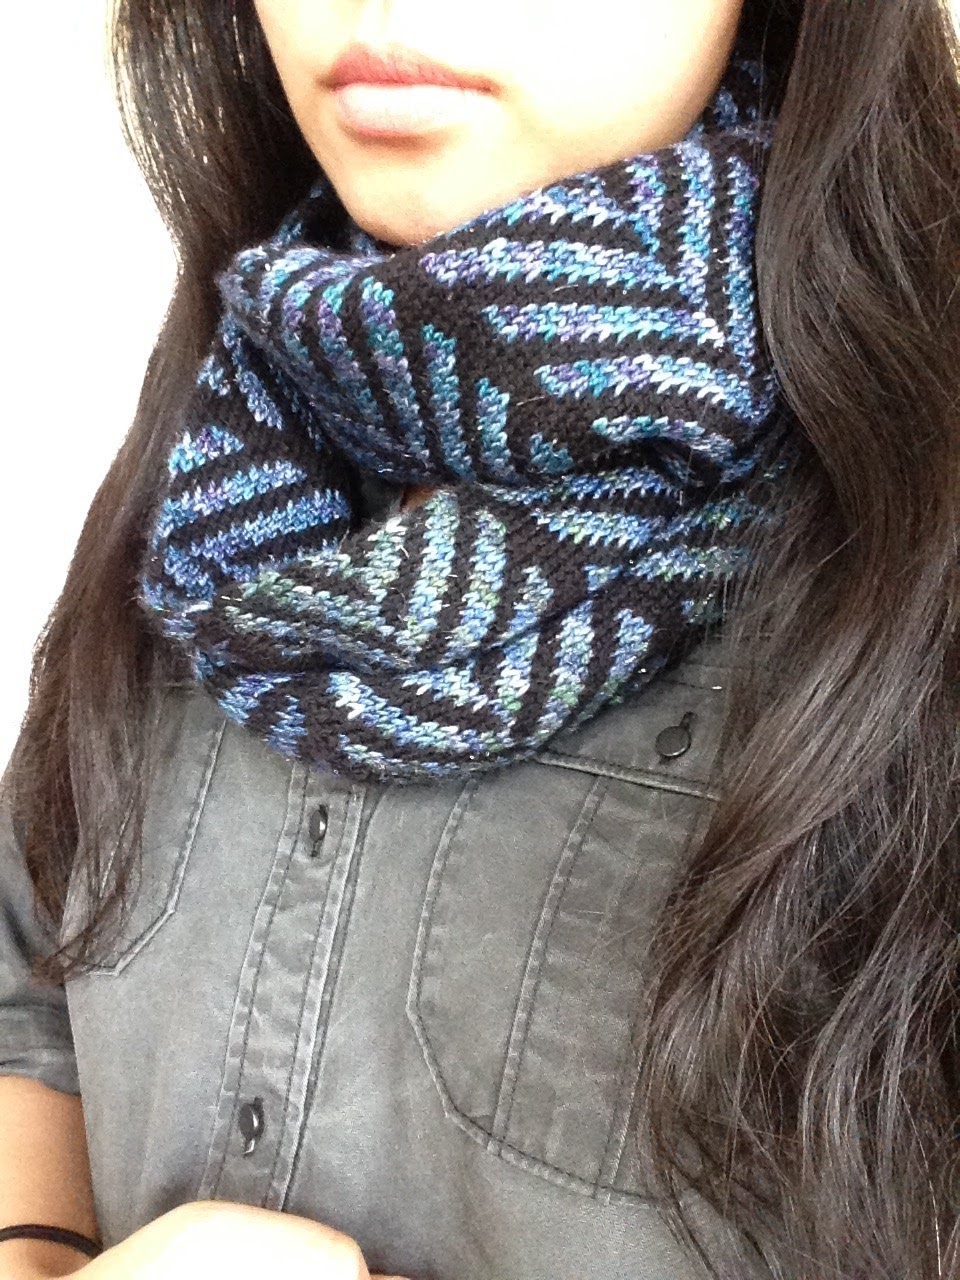
    Herrington Infinity Scarf

    I started the Herrington Infinity Scarf in March, before quilting took over my free time. Though it's not a big project, it took me 7 months of on and off working to finally finish it. I also suspect the warmer weather has something to do with it, as I'm just not as interested in making cold weather accessories when I can't wear it anytime soon.

    However, we're officially into not only knitting season, but knitwear season! I'll get to wear this infinity scarf soon, I hope.

    I enjoy doing stranded knitting a lot, and it's even lovelier to see the finished result. This cowl is stranded and double layered, so it's super warm, and I love the interplay of black and variegated blue a lot. I didn't have enough of the original yarn at the end, but happily I found a leftover skein in my stash that is not only from the same brand but also very similarly colored. I alternated it with the original I had and gradually shifted to the new yarn, and I don't think it's that obvious. Or, hopefully, it looks intentional.

    To Regulate or Not To Regulate, That Is the Question

    When I decided to buy my Handi Quilter Sweet 16, the feature I was most excited to have was the TruStitch stitch regulator. I loved the idea that I don't have to worry about my stitch length and can concentrate on the design. The idea sounded pretty fabulous, because in the beginning, I was sure that consistent stitch length is the be-all end-all factor in the quality of my free-motion work. (I blame that idea on marketing.)

    I've discovered pretty quickly that it really isn't so. It doesn't take very long to find a pace that produces stitch length that is good enough in consistency. What's challenging is everything else, which the stitch regulator doesn't solve. I find that I only use it for a little while when I haven't done free-motion for awhile, for it gives me a little boost of confidence that the machine wouldn't take off like a runaway horse. I usually turn it off after just a few minutes when I've gotten used to the sound of the machine.

    The problem with TruStitch is how it works. It requires that the disc shaped sensor be moved at the same rate that the quilt top is moving, so that it can send a signal to the receiver that let's the machine know how fast to move the needle to produce a consistent stitch length. There are 2 modes for it:

    1) Clip-mode - I clip the sensor to the side of the quilt and then can only hope that it will move at the same pace as the quilt itself as I stitch. Of course, this only works either on the edge of the quilt, or on very small quilts, as in mug rug sized quilts. I find myself adjusting it a lot even then, and at the end it slows me down. There are also times when the quilt top will prefer to fold than pull the sensor along, as the sensor is heavier than the quilt.

    2) Magnet-mode - This is the most common usage as it's the only option for bigger quilts. I place the quilt between the sensor and the magnet, and then place my hand on top of the magnet to navigate the quilt which moves the sensor, sending a signal to the sensor. The problem with this is that I'm just not able to be as precise as when both hands are on the quilt surface, guiding it. So in this mode, my stitch length may be consistent, but it's harder to make the design look as good.

    On top of that, when using TruStitch I definitely can't stitch as fast. The machine's motor whirs on and off, and can throw off my rhythm a bit, and sometimes, for reasons I can't understand, it stops working just for a second, and my stitches suddenly get really big, which sort of defeats the purpose.

    Sewing machine companies and their marketing department has convinced a great many of us that stitch regulation is the key to free-motion quilting. It really isn't. While I like having TruStitch, it is not worth the extra money.

    Tuesday, October 4, 2016

    Things Beginner Quilters Should Be Told

    I'm completely self-taught as far as quilting goes. I learned mostly from Craftsy, and a few occasional YouTube videos and blogs. I've developed such a passion for it and I can spout poetry about how much I love to quilt (machine quilting, in particular), but the journey wasn't the easiest in the world.

    Here are a few things I wish someone had told me when I first started:

    1) Everybody has an opinion. They're just opinions.

    When I first started learning to quilt, I naturally took advice from the first teacher I had. Press seams to the side, toward the dark side. Use steam and starch. Use cotton thread. Then, when I really got into it and started reading different resources and taking classes from different teachers, I was shocked at how wide the opinions are in the quilting world. For every issue, there are people, all very well-known and renowned quilters, standing on each side. Press to the side or press them open? Steam or no steam? Polyester or cotton thread? These are just a few of the debates going on, and I quickly realized there really is no right or wrong in general. There are a lot of "gasp, you can't do this" myths that are more rooted in tradition than anything else, and sometimes it's just personal experience that is circumstantial.

    It's important to remember that everybody has an opinion, there are general guidelines, but it's important to decide for yourself what you like to do. I too have formed my own set of opinions, and now know better than to question my own practices just because a quilting teacher said it has to be done a different way.

    2) It's totally okay to machine bind.

    I collect quilting books, and upon looking through them, about 95% of them have a section on how to cut, make a sandwich, baste, quilt, bind. It's kind of a waste of paper, actually, because it's usually not enough information for people who don't know how to do it, and for those who do, it's redundant. However, I noticed that for all the books I own with that section, nearly all of them teach stitching down the back of the binding by hand with a slip stitch and nothing else. I personally hate hand stitching, so I always machine bind, and when done right, it's virtually invisible from the front. I think about 5% of the quilting books I own even mention machine binding as an option and not a sacrilege. Seriously, it's stronger, and when done right, you can't see it from the front anyway. It's not traditional ... but I don't know why that should matter.

    3) Do not start your free-motion life by stippling.

    I too fell into the trap of feeling like I needed to master meandering / stippling before moving on to other designs, despite the fact that I hated it. It looked like worms, and it was so hard! Then I did pebbling, and realized how easy it was for me, and quickly discovered that it doesn't matter that I can't stipple. I can do other things, and on top of that, I don't even like stippling.

    As it turns out, I wasn't the only one. Lori Kennedy has a great post on why stippling is so hard for so many people, and it made a lot of sense. Yet, so many free motion teachers and resources start by suggesting stippling, and they make it sound like it's the easiest design. So those of us who can't stipple end up thinking that if I can't even do this *easy* design, there's no hope for me. Just move on, there are so many better looking designs that are actually much easier for beginners.

    4) If you can't do it, cheat.

    I wrote a post about this awhile ago that I call piecing cheats. I'm not great at piecing, so I find ways to achieve a similar look I want without doing the harder work. At the end of the day, it still looks good, and really, nobody knows I cheated. Or should care.