At first, I just wanted to take a little break from blogging. Just a few weeks. But then, once I got off the schedule, it became easier and easier to just let it keep slipping. And before I knew it ... a few months slipped by. I've been spending less time quilting in the past few months and more time on other endeavors, but I managed to finish a few gift quilts finally.
The first one is a quilt and pillow set for my daughter. She is going through a massive unicorn phase, so I knew she'd love this panel set by Sarah Watts from her Crescent collection. It was a rather large quilt so it took awhile, but I did a simple allover paisley design.

Next up is another large panel I quilted for my mother. When she requested a quilt, she wanted two things: black / white and no piecing. I found a gorgeous Aztec inspired panel on Honest Fabric which was then printed on demand, and I quilted this with straight lines. I won't lie ... this was a
really hard quilt because without piecing and seam lines to follow, it is really hard to keep the lines straight across the quilt. Overall I still think it looks nice and I sure hope my mom likes it!

After that is another challenging quilt, but challenging for a completely different reason. My mother-in-law had given me a very old quilt that
her mother had pieced years ago, and it was by far one of the most challenging tops I'd ever wrestled with. The whole thing was wavy, puckery, and the fabrics were stretched badly in areas. I almost gave up on it and wanted to send it to someone else to finish it, but in the end powered through. I used a loopy design that was at least very quick to do, though I could not avoid quilting a lot of tucks into it. I probably should have sent it to someone else who had a better idea of how to handle tops like these, but I knew it'd mean more if I finished it myself. At the end of the day, I can only hope she's happy with it.

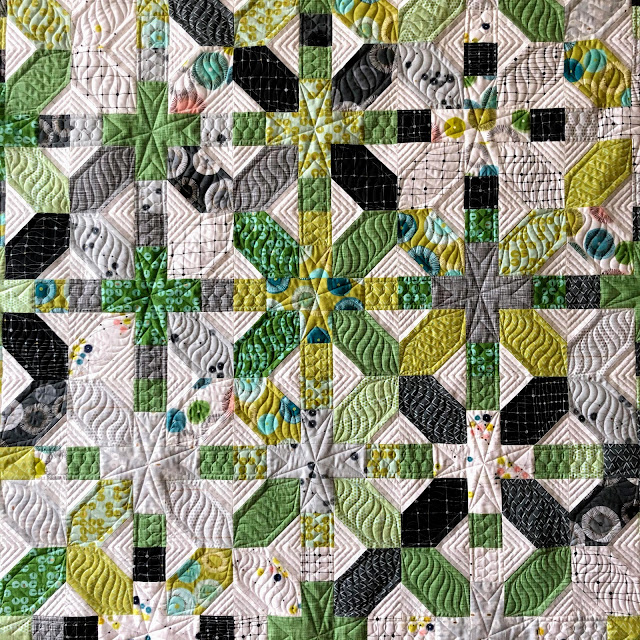
Finally, piggybacked onto the vintage quilt, I finished a table runner for my sister-in-law as a housewarming present. Never mind that she moved into that house several years ago! She picked the fabric and the pattern, and I really enjoyed making this modern and beautiful table runner. The pattern is called Calamity Crosses by Jenifer Dick. I quilted this with straight lines only in an improv kind of way, and I really like how it turned out.

With these gift quilts off my plate and off my mind, I will now have to decide which of my own quilt tops to quilt next. It's not an easy decision because I have ... 93 of them. (There, I said it!)
 I really enjoyed working on this quilt because of the gorgeous fabrics, and I knew the quilting just had two jobs: play up the huge borders and show off the fabrics on the blocks.
 This quilt was rather easy to design quilting for as I didn't have a story in mind (unlike Rainbow Road), so I just wanted to play up the design of the quilt. I created some channels in the borders that extend the block design, and filled them with a combination of swirls and more linear designs.
 I quilted each block with a few different designs, including serpentine lines, ribbon candies, straight line echoes, and dot-to-dot designs.
 This quilt is pretty big at 83" x 83", and I had such a great time working on it. The colors are perfect and I'm really happy with how the quilting turned out. I hadn't quilted a swirl or ribbon candy in several months, and I missed it!


